
Table of Contents
Configure your EasyMail account as IMAP in Thunderbird #
- Launch the Thunderbird application in your system.
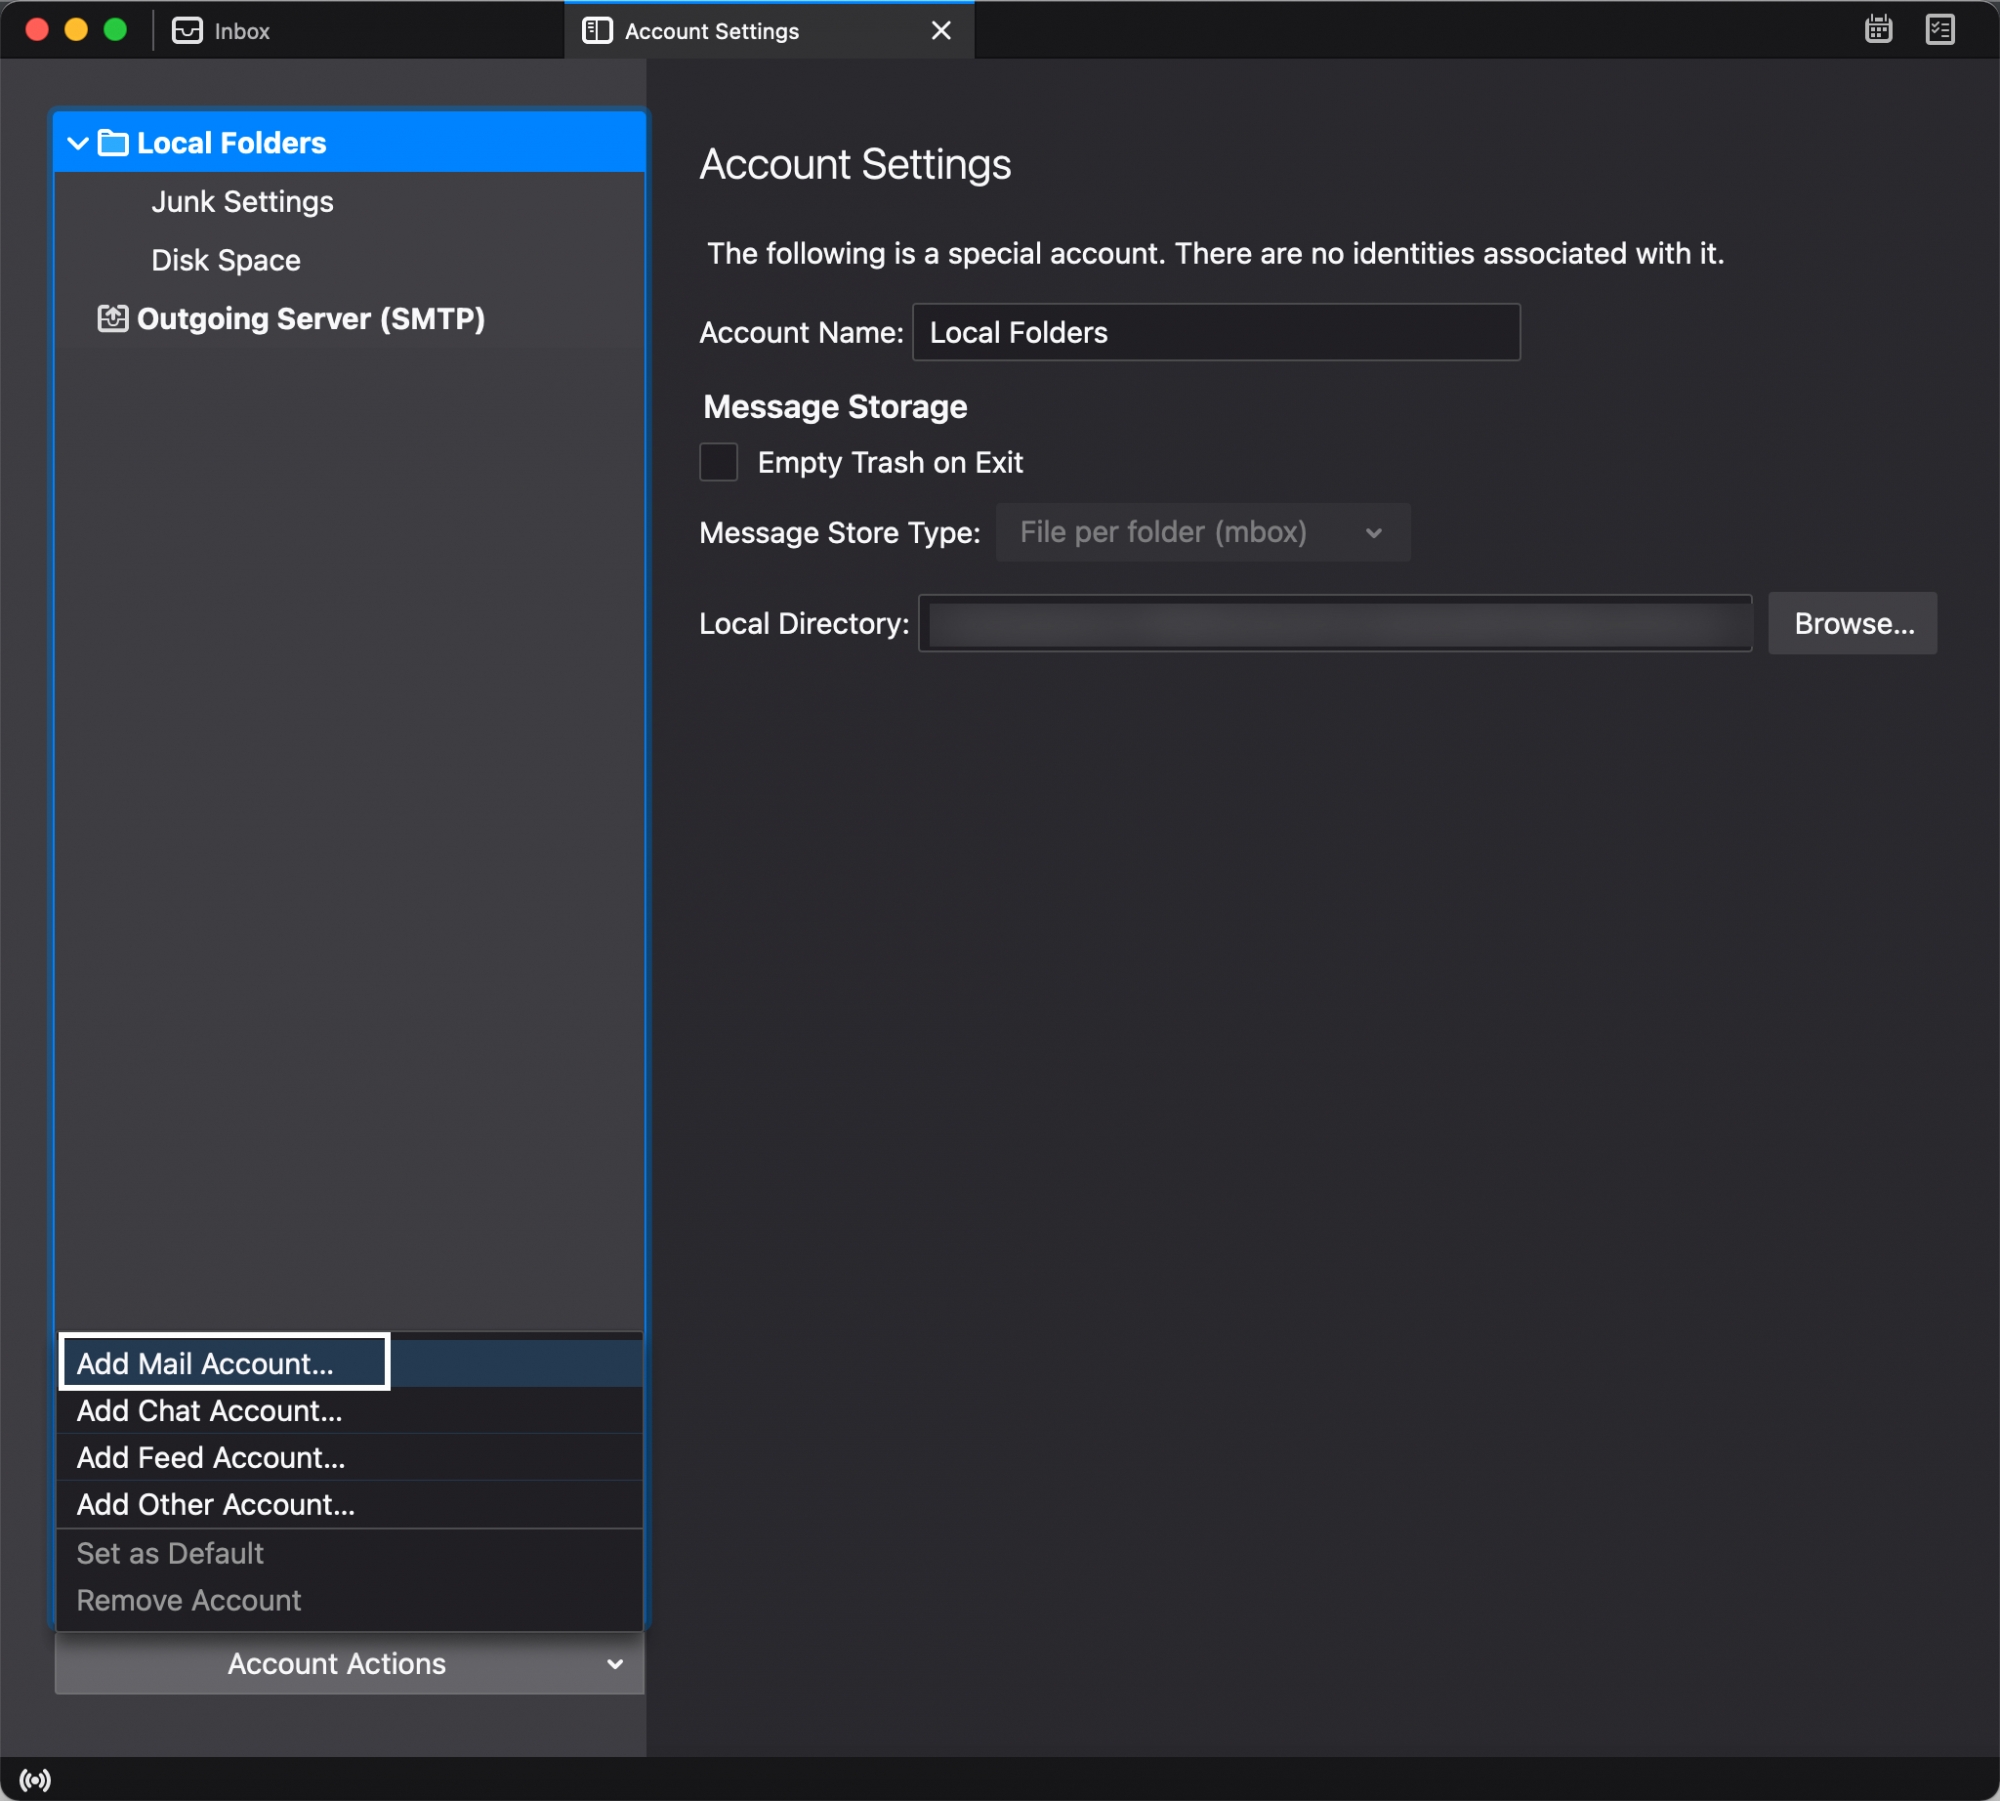
- In the menu bar, navigate to Tools and then select Account Settings.
- At the bottom of the left pane, click Account Actions and select Add new account.
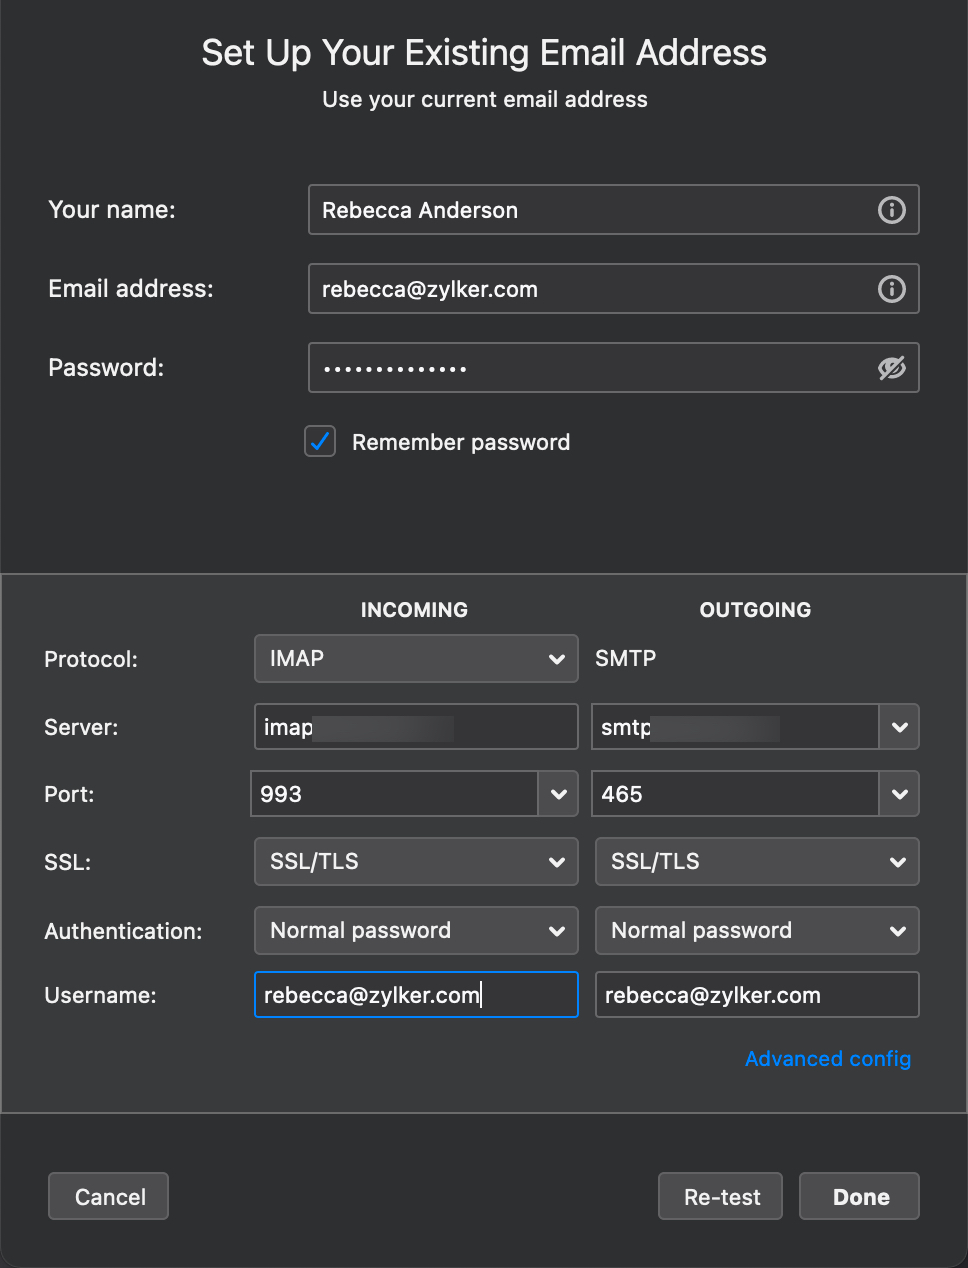
- Enter your name, your Easymail email address, and your Easymail email address’s password.
- Once done, click Continue. Thunderbird should fetch the Incoming and Outgoing server details from EasyMail. If Thunderbird fetch failed or you want to edit the server details, click the Configure Manually… button.
- On the manual configuration page, enter the Server and Account details as per the instructions given below.
- For Incoming, select IMAP from the drop-down.
- Incoming server hostname:
- If you are an organization user with a domain-based account, provide mail.easymail.biz, select 993 for Port from the drop-down, and Normal Password for authentication.
- For Outgoing server hostname:
- If you are an organization user with a domain-based account, provide mail.easymail.biz, select 465 for Port from the drop-down, and Normal Password for authentication.
- In the username field, provide your complete EasyMail account email address (you@yourdomain.com). If you’re using a different Outgoing email address, enter the respective address.
- Click Done to create the account. Clicking Test might give an error message and reset the settings you configured.
Folder Sharing from Thunderbird IMAP Client #
EasyMail offers options to share folders with certain permissions to users.
Installing the ACL Extension #
Folder Sharing is also supported in the Thunderbird IMAP client. To share folders from Thunderbird, you will have to download the ACL extension.
In the Thunderbird client, locate the menubar, click the Tools option, and choose Add-Ons. Select Extension from the left menu, and search for ACL. Install the extension. Click on Restart Now after you’ve downloaded the extension. The extension will now be enabled in your Thunderbird Desktop client.
Steps to Share Folders: #
- Once the extension has been enabled, choose the folder that you want to share.
- Right-click on the folder name.
- Choose Properties from the listing.
- Click on the Sharing tab, click on Set Permissions, and click Ok.
- The Share permissions, if you’ve already added any, will be listed in the popup.
- To add new sharing permissions, click on New, and click Ok.
- Select the permissions from the window that pops up.
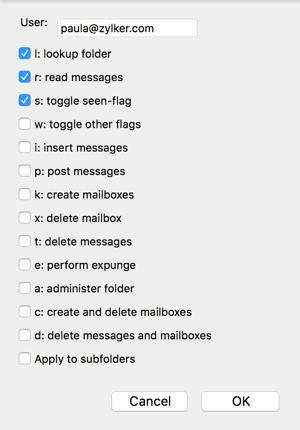
- If you want to assign Read permissions, select the l: lookup folder and the r: read messages checkbox and click Ok.
- If you want to assign Write permissions, select the l: lookup folder, r: read messages and s: toggle seen-flag checkbox and click Ok.
- The folder, with the assigned permissions, will be shared with the respective user.
- You can take a look at all the folders that have been shared by clicking the List all ACLs option.


